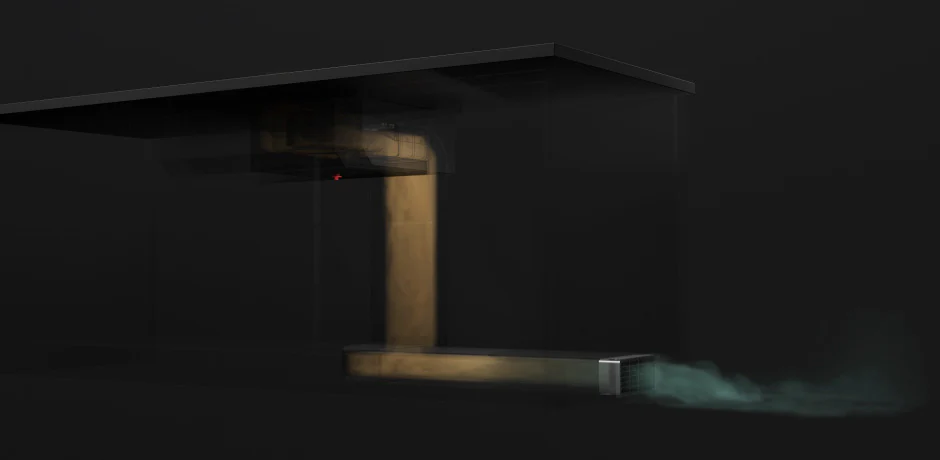
Planning the ducting for an extractor hob is a crucial task to ensure efficient kitchen ventilation. Proper ducting removes unwanted smoke, odors, and grease particles, maintaining a healthy kitchen environment. In this comprehensive guide, we will detail the steps to plan your extractor hob ducting effectively.

Why is Proper Ducting Important?
Proper ducting ensures the extractor hob operates at peak efficiency. Incorrectly installed ducting can lead to poor air extraction, increased noise levels, and higher energy consumption. It also helps in extending the lifespan of your extractor hob and maintaining a pleasant kitchen atmosphere.
Key Considerations for Planning Extractor Hob Ducting
Selecting the Right Location
The location of the extractor hob is the first crucial consideration. It should ideally be placed centrally to minimize the length of ducting required. Shorter ducts reduce resistance and improve extraction efficiency. Ensure the chosen location has access to an external wall or ceiling for easy venting.
Choosing the Appropriate Duct Type
There are several types of ducts available, including:
- Rigid Ducts:Made from materials like metal or PVC, these are durable and offer the best performance with minimal resistance.
- Flexible Ducts:Made from flexible materials, these are easier to install but can suffer from higher resistance and reduced efficiency.
- Semi-Rigid Ducts:These offer a balance between rigidity and flexibility, providing moderate ease of installation and performance.
For the best results, rigid ducts are recommended due to their superior airflow characteristics.
Sizing the Ducts Correctly
The size of the duct is crucial for effective extraction. The diameter of the duct should match or exceed the size of the extractor hob's outlet. Common duct sizes are 125mm and 150mm. Using a duct that is too small can reduce airflow and increase noise, while a larger duct ensures smoother air movement and better performance.
Minimizing Duct Length and Bends
To maximize efficiency, the ducting should be as short and straight as possible. Each bend in the duct reduces airflow and increases the work the extractor fan has to do. If bends are necessary, use smooth, gradual curves rather than sharp angles to minimize resistance.

Choosing the Right Ventilation Cap
The external cap where the ducting exits your home is also important. Options include:
- Wall Caps:Installed on the exterior wall, these should have a backdraft damper to prevent cold air from entering.
- Roof Caps:Used when ducting through the roof, these should be weatherproof and have a damper.
Choose a cap that matches your duct size and ensures it has features to prevent drafts and pests.
Installation Steps for Extractor Hob Ducting
Planning the Route
Before installation, plan the entire route of the ducting. Mark the path from the extractor hob to the exterior vent, ensuring the path is as direct as possible. Avoid any obstacles that may complicate the installation.
Cutting the Ducting Holes
Carefully cut the necessary holes in the walls or ceiling for the ducting. Ensure these holes are slightly larger than the duct to allow for any adjustments and secure fitting. Use appropriate tools like a jigsaw or hole saw for clean cuts.
Installing the Ducting
Begin by connecting the duct to the extractor hob. Use clamps or duct tape to secure the connection, ensuring it is airtight. Run the duct along the planned path, securing it to walls or ceilings with brackets or straps. For rigid ducts, ensure each section is tightly joined.
Sealing the Ducts
All joints and connections should be sealed with duct tape or mastic to prevent leaks. Leaks can reduce the efficiency of the extraction and lead to noise issues. Ensure the entire ducting system is airtight for optimal performance.
Installing the External Vent Cap
Attach the chosen vent cap to the exterior wall or roof. Ensure it is securely fastened and sealed to prevent water ingress and drafts. If using a wall cap, make sure the backdraft damper operates smoothly.
Testing the System
After installation, test the extractor hob to ensure it is working correctly. Check for any air leaks along the ducting and ensure the airflow is strong at the vent cap. Listen for any unusual noises that may indicate a problem with the installation.
Maintenance Tips for Extractor Hob Ducting
Regular Cleaning
Regularly clean the ducting to prevent the buildup of grease and debris. This can be done by detaching sections of the duct and washing them with soapy water. For flexible ducts, ensure they are thoroughly dried before reinstallation.
Checking for Leaks
Periodically inspect the ducting for any signs of air leaks. Seals can degrade over time, so reseal any joints that show signs of wear. This helps maintain the efficiency of the system.
Inspecting the Vent Cap
Ensure the external vent cap remains clear of obstructions like leaves or nests. Clean the cap and check the backdraft damper to ensure it operates correctly, preventing drafts and maintaining airflow.
Professional Inspection
Consider having a professional inspect your ducting system annually. They can identify any issues that may not be immediately apparent and ensure your system continues to operate at peak efficiency.
Conclusion
Planning the extractor hob ducting is essential for maintaining a healthy and efficient kitchen environment. By selecting the right location, duct type, and size and ensuring a proper installation, you can significantly improve the performance of your extractor hob. Regular maintenance will keep the system functioning smoothly, ensuring clean air in your kitchen.

